Migrating Your Local XAMPP WordPress Website to Hostinger
In this article, I’ll guide you through the process of transitioning your WordPress website from your local XAMPP environment to Hostinger, making it live on your domain. Follow these steps carefully to seamlessly migrate your website and ensure its smooth transition to its new hosting platform.

Step 1:- Prepare file
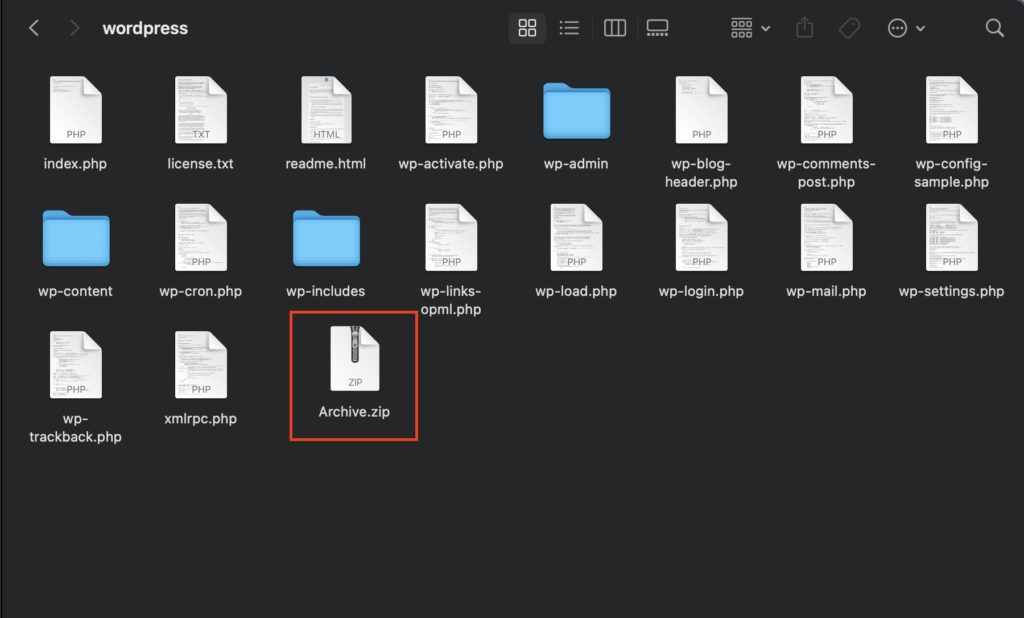
First, navigate to your website folder located within the XAMPP directory: XAMPP -> htdocs -> wordpress (or your specified folder).
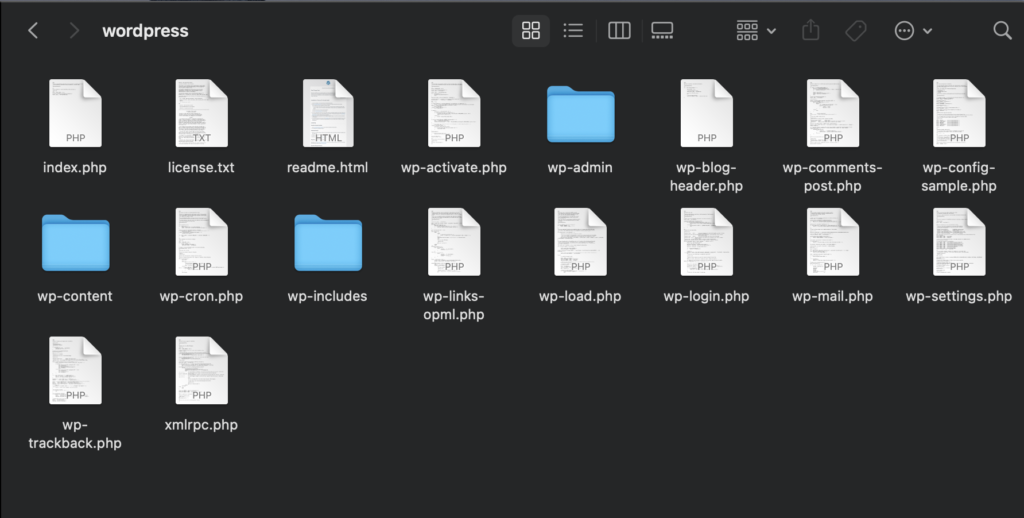
Ensure all files are converted into a zip archive.
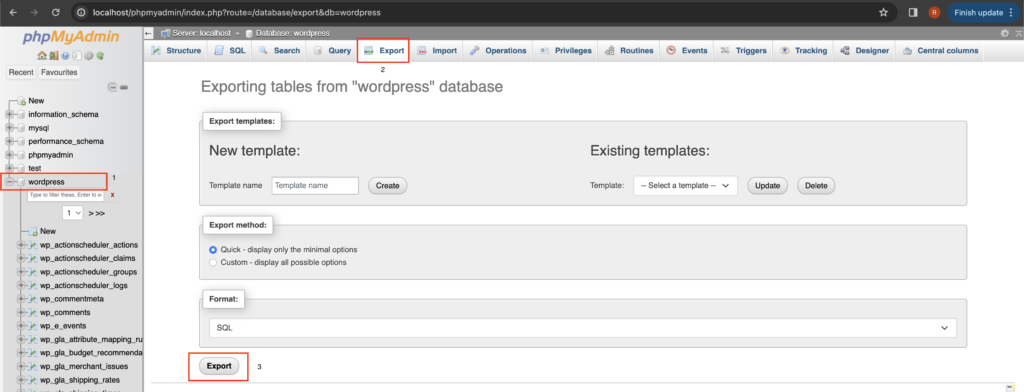
Step 2 Export database
Access phpMyAdmin, select your database (e.g., “wordpress”), and export it as an .sql file. select your database in my case it is wordpress -> export -> export
Step 3 Import Local Website Files to Hostinger
In your Hostinger account, navigate to Websites -> Manage -> File Manager.


Now delete existing files in the public_html folder


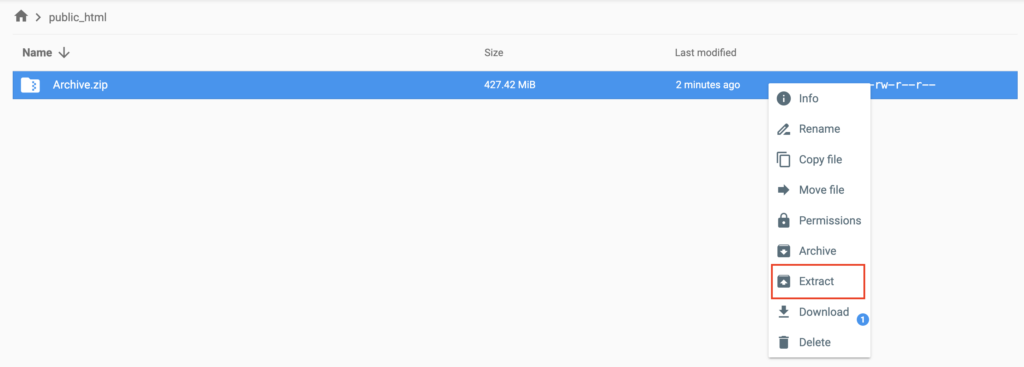
upload your zip archive in public_html folder, and extract its contents.


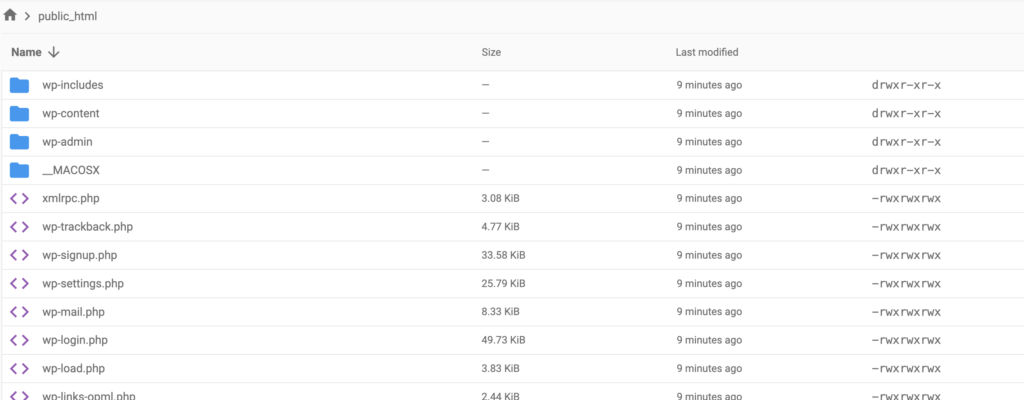
Move files from the extracted “Archive” folder to public_html. go to Archive folder select all files -> right click -> move files -> select public_html folder to move -> click on move. your all file should move to public_html folder.
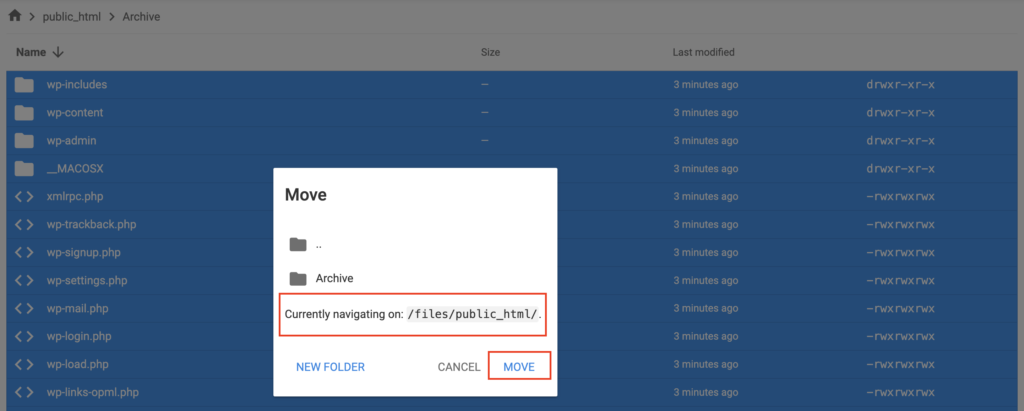
After all the files move successfully then Remove the “Archive” folder and zip file from public_html folder.
Step 4 Setup the database
On the Hostinger dashboard under websites tab click on manage -> database.

Now create one database give any database name, user and set the password. make sure that set proper password. click on create.
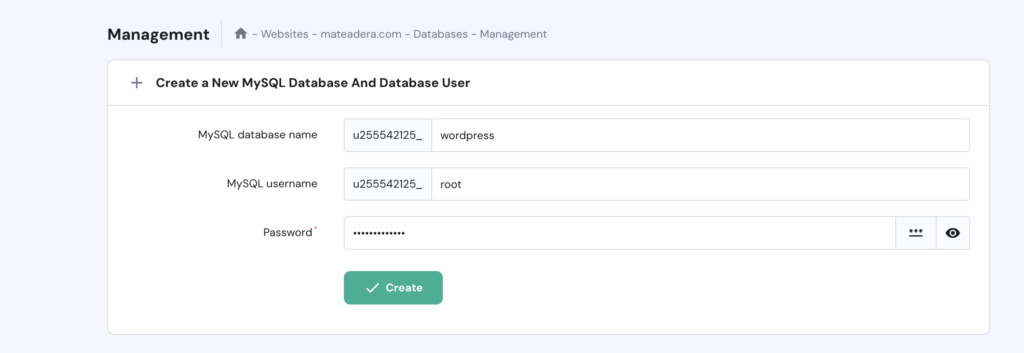
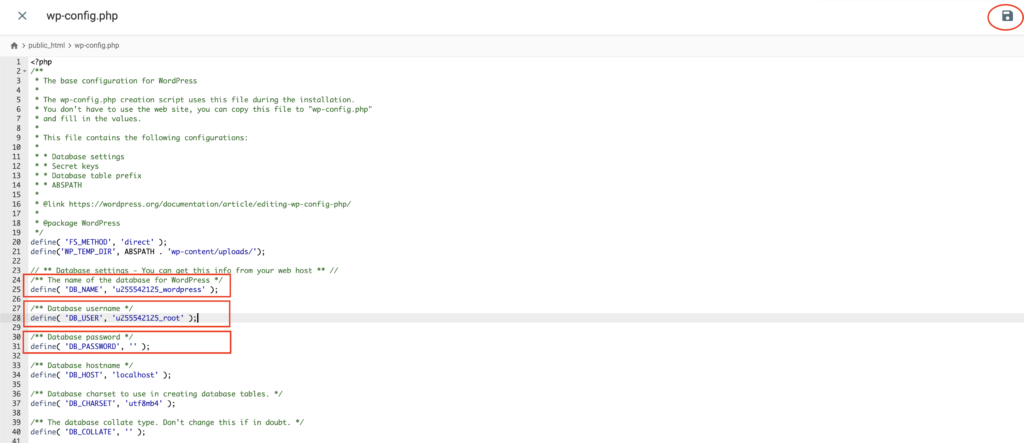
Now we have to mention database details in “wp-config.php” file go to file manager -> public_html -> open wp-config.php file. in this file mention DB name, user and password that you set during database created. mentioned complete database name and user name. Save the file.
Step 5 Configure database
In the database section click on “Enter phpMyAdmin” on your database. now we have to import .sql database file to our new database.

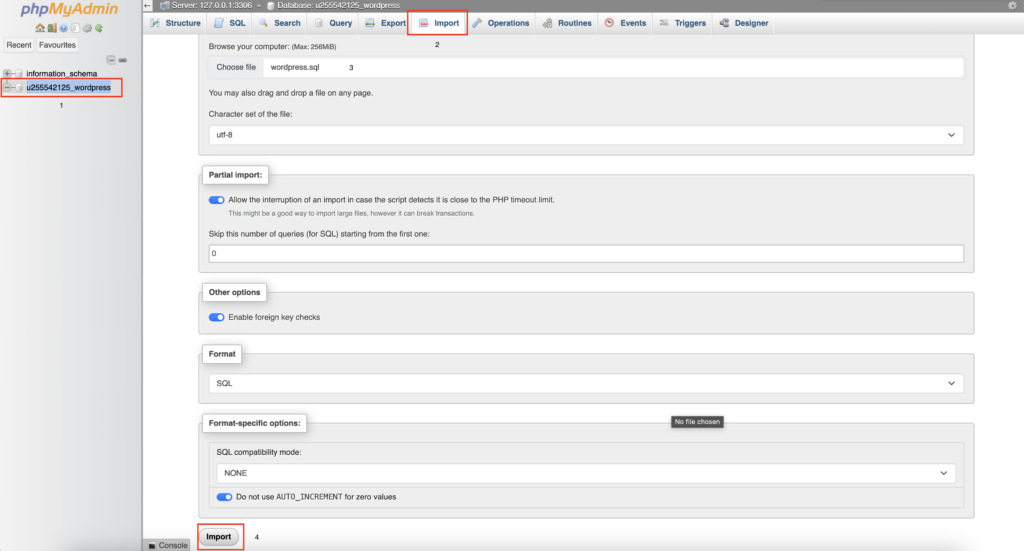
Now select your database u255542125_wordpress -> click import -> choose .sql file -> click import button
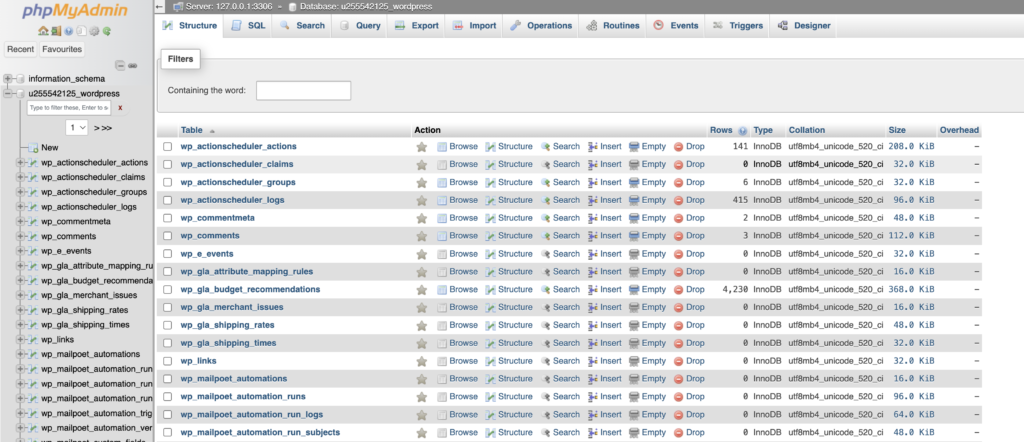
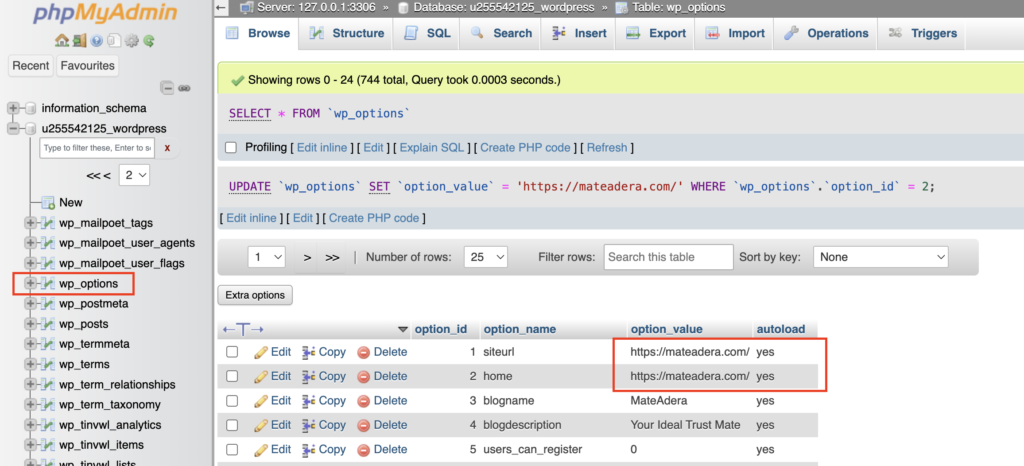
Now we have to add our hostinger website URL in to “wp_options” table. click on wp_options table enter your website complete URL into option_value column of 1st and 2nd row
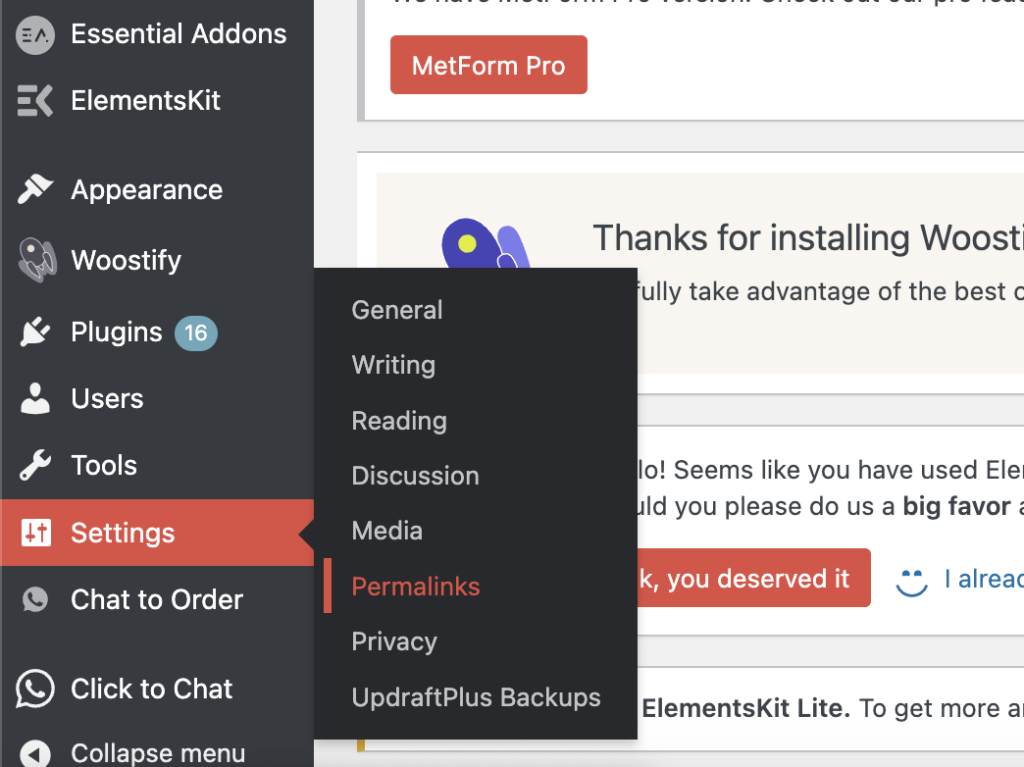
Now your website is live you can check your URL. but sometime only home page work properly and other pages give error. to solve this problem open wordpress dashboard. on hostinger dashboard in websites tab click on Admin panel -> settings -> permalink -> save changes.


Our Website is Live Now

conclusion:-
By following these steps, you’ve successfully migrated your local XAMPP WordPress website to Hostinger, making it live on the internet. Remember to reconfigure image paths if necessary, as local paths won’t work on the live website. Your WordPress site is now ready for visitors on its new hosting platform!

Nice Explaination!!
Thanks, very helpful
Concise Explanation,Good Job !